Flag Messages
(Topic Last Updated On: 05/05/2010)
The Flag Messages window is displayed below, and is a pop-up window that displays automatically on various screens throughout the system to communicate flag messages among staff and patients. There are five types of messages that can appear on this window: Patient Flags, System Flags, Removable System Flags, Scheduled Event Flags, and Scheduled Group Event Flags. Each of these flag types are displayed and discussed in detail below.
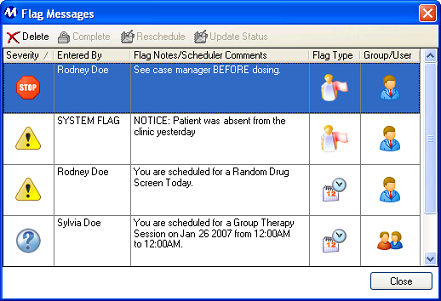
Flag Messages window - a Patient Flag is selected
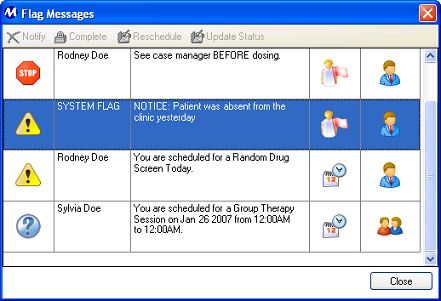
Flag Messages window - a System Flag is selected
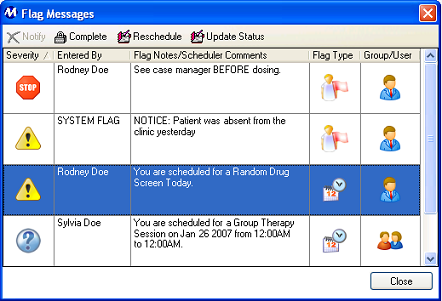
Flag Messages window - a Scheduled Event Flag is selected
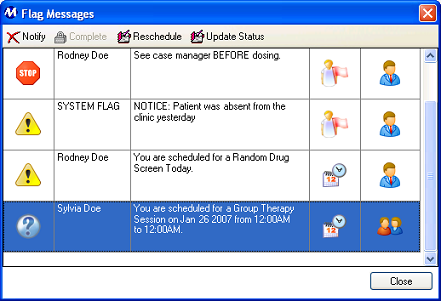
Flag Messages window - a Scheduled Group Event Flag is selected.
Grid Columns
Severity
This column displays the 'Flag Severity' of the message using different icons as indicated below:
|
Flag Severity
|
Informational
|
Warning
|
Financial
|
Stop Dose
|
|
Icon
|

|

|

|

|
The 'Stop Dose' severity is tied to functionality that will prevent a patient from dosing until the flag is deleted or the related scheduled event is updated, provided that the Stop Dose flag message is set to appear on the Dose Patient screen. If a Stop Dose flag is entered to appear at the self check-in Kiosk workstation, it will prevent the patient from checking in at the Kiosk.
Entered By
This column displays the 'Employee ID' (User ID) of the user who entered the flag or scheduled the event in the system. 'System Flag' is displayed in this column for any system flag generated automatically by the system.
Flag Notes/Scheduler Comments
This column displays the flag or scheduled event message that is communicated to patients and/or staff members.
Flag Type
This column displays the 'Flag Type' of the message using different icons as indicated below:
|
Flag Type
|
Patient Flag
|
Scheduled Event Comment
|
|
Icon
|

|

|
Group/User
This column displays whether or not the message is related to a Scheduled Group Event, using icons as indicated below:
|
Group/Individual
|
Individual
|
Group
|
|
Icon
|

|

|
Command Buttons
Delete/notify
This button will appear as Delete if a Patient Flag or Removable System Flag is selected, and pressing it will initiate deleting the selected flag. This button will appear as Notify if a Scheduled Group Event Flag is selected, and pressing it will clear the message for that patient for that group event. This button becomes disabled when a Scheduled Event or System Flag is selected.
Complete
This button is only enabled when a Scheduled Event Flag is selected. Pressing this button will update the status of the associated event to 'Complete', which prevents the message from popping up again for the patient.
Reschedule
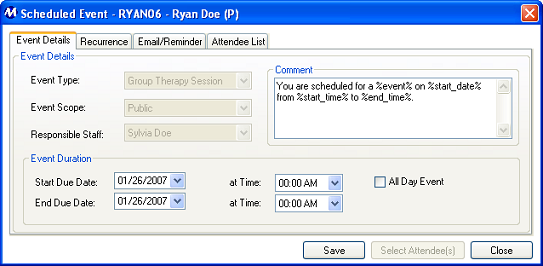
This button is only enabled when either a Scheduled Event or Scheduled Group Event Flag is selected. Pressing this button will bring up the Scheduled Event window (shown below) for editing the date and/or time of the event.
Update Status
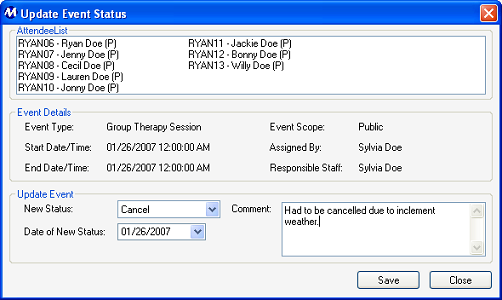
This button is only enabled when either a Scheduled Event or Scheduled Group Event Flag is selected. Pressing this button will bring up the Update Event Status window (shown below) for updating the status of the event.
Close
Pressing this command button closes the Flag Messages window. If a System Flag is selected, this button is the only button that will remain enabled.
Procedures
How to Delete a Patient Flag
|
1.) Select the flag you wish to delete by clicking on it in the grid.
2.) Click on the Delete button.
3.) A message box will appear asking if you are sure you want to delete the flag. Click on Yes to delete the flag, or No to return to the Flag Messages window.
|
How to Address System Flags
|
System Flags are automatically generated by the system on the basis of conditions, and appear throughout the system to inform staff of important patient information. System Flags usually cannot be deleted, and are intended for informational purposes. After reading a system flag, click on the Close button to close the Flag Messages window. The text of the System Flags used in Methasoft are displayed below, each with an explanation of the flag and how it should be addressed.
WARNING! Titrate/Detox schedule was canceled because the nightly processes did not run.
This flag appears on the Dose Patient screen when a patient who's titrate/detox schedule was cancelled by nightly processes is retrieved. The patient's titrate/detox schedule needs to be re-entered on either the Orders or Titrate/Detox Schedule screens, after either viewing the hard copy of the order or viewing the order in the patient's Order History. This flag is an example of a Removable System Flag.
NOTICE: Patient was absent from the clinic yesterday.
This flag appears on the Payments and Dose Patient screens when a patient who was absent the day before is retrieved. This message is for informational purposes only.
NOTICE: Patient has been absent from the clinic for ____ consecutive days. You may want to review the dosage amount before dosing this patient.
This flag appears on the Payments and Dose Patient screens when a patient who has been absent for consecutive days is retrieved. The number of consecutive absences is displayed in this message. This message is for informational purposes only.
DOSING LOCKED!!! Patient's balance is overdue.
This flag appears on the Dose Patient screen when a patient who has an overdue balance is retrieved. This will only appear if the related system preference is turned on to lock out patients with overdue balances from dosing. If this message appears, the patient cannot be dosed in the system until his balance reaches an acceptable level.
Patient has not received a Dose Receipt for today.
This flag appears on the Dose Patient screen when a patient who's not been checked in at the front desk is retrieved. This will only appear if the related system preference is turned on to require patients to check in before dosing. If this message appears, the patient cannot be dosed in the system until someone checks her in on the Payments screen. Once checked in, clicking on Show Flags on the Dose Patient screen will clear this message.
Patient's balance is overdue.
This flag appears on the Payments and Dose Patient screens when a patient who has an overdue balance is retrieved. This will only appear if the related system preference is turned on to display a balance overdue flag for patients carrying overdue balances. This message is for informational purposes only and does not prevent a patient from dosing in the system.
This patient is scheduled to be Guest Dosing at another clinic and should not be here today. Please correct the patient's Guest Dosing schedule and try again.
This flag appears on the Dose Patient screen when a patient who's scheduled to be guest-dosing at another facility is retrieved. The patient's guest dosing schedule needs to be edited on the Guest Dose Schedule screen to exclude the current date. Once the schedule has been edited, re-retrieving the patient will clear the flag.
Patient has returned to the clinic early. Please verify reason before clearing patient to dose.
This flag appears on the Payments screen when a patient returns early to the clinic before their expected Return Date. It is for informational purposes only, to alert personnel and decrease the possibility that a patient will be double-dosed.
|
How to Complete a Scheduled Event
|
1.) Select the Scheduled Event Flag by clicking on it in the grid.
2.) Click on the Complete button.
|
How to Reschedule a Scheduled Event
|
1.) Select the Scheduled Event or Scheduled Group Event Flag by clicking on it in the grid.
2.) Click on the Reschedule button.
3.) The Scheduled Event window will appear, displaying the 'Event Duration' fields for changing the date(s) and/or time(s) of the event. Make changes in these fields to the new time and/or date.
4.) Click on the Save button on the Scheduled Event window.
|
How to Update the Status of a Scheduled Event
|
1.) Select the Scheduled Event or Scheduled Group Event Flag by clicking on it in the grid.
2.) Click on the Update Status button.
3.) The Update Event Status window will appear. Select the event's new status in the 'New Status' field.
4.) (Optional) Enter a comment in the 'Comment' field.
5..) Click on the Save button on the Update Event Status window.
|
How to Notify a Patient for a Group Scheduled Event
|
1.) Select the Scheduled Group Event Flag by clicking on it in the grid.
2.) Click on the Notify button.
|
Considerations
Be Careful When Deleting Flags or Completing Scheduled Events
Deleting flags or completing scheduled events when the event has not been taken care of can cause a lot of unnecessary grief for patients and staff. It is recommended that your facility establish a firm policy and procedure regarding the use of patient flags and scheduled events in the system, so that each user knows what should and shouldn't be done in relation to these messages.
Be Careful When Adding Patient Flags or Scheduled Events
Related to the consideration above, users who schedule events or enter patient flags can help avoid such unnecessary grief by scheduling events and entering flags responsibly. For example, If you are a counselor and going on vacation for two weeks, make sure that any Stop Dose flags scheduled during your vacation have been removed or rescheduled, or that proper arrangements have been made so that staff that is present will know how to respond when those flags appear.
Related Topics
Flag Patient
Scheduler - Review Events
Scheduler - Calendar
Patient Payments
Dose Patient
Prepare Daily Pour
Daily Activities
Guest Dosing Schedule
Titrate/Detox Order
Absent Records
Related Reports
Patient Flags
Scheduled Events
Scheduled Events by Counselor
Scheduled Events by Patient
Scheduled Events by Responsible Staff
Scheduled Events Summary
Guest Dosing
Titrate/Detox
No Show Report
Related Preferences
Use Flags for Random Drug Screens instead of the Scheduler
![]()
![]()


