![]()
![]()
(Topic Last Updated On: 09/14/2015)
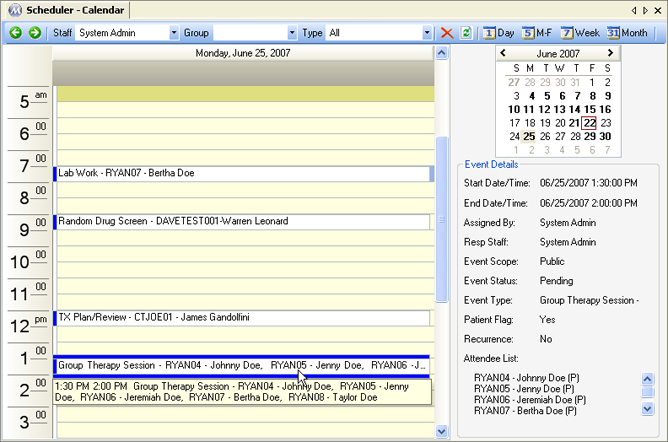
The Scheduler-Calendar menu item on the Other Activities menu launches the Scheduler-Calendar screen, which is to schedule, review, add, edit, update and delete scheduled events. Most users prefer this screen to the Scheduler - Review Events window because of it's intuitive interface and drag-and-drop rescheduling capabilities. Users can view Event Detail information by selecting an event on the calendar and viewing the Event Details frame on the right. Right-clicking on an event provides options for Editing, Deleting, Completing, Rescheduling, Cancelling a Completed Event or Updating the Status of the event. This screen offers 1-Day, 5-Day (M-F), 7-Day (Week), and 31-Day (Month) views, along with a toolbar at the top for navigating to different dates, parameter filters to limit the events displayed, and delete and refresh options. The calendar control in the upper-right hand corner allows for easy rescheduling and navigation among dates.
Staff
This field is used to filter out events and only display the scheduled events a particular staff member is responsible for. By default this field will display the name of the logged in user. Available selections include all active Methasoft users.
Group
This field is used to filter out events and only display the scheduled events a particular group of staff members is responsible for. By default this field is blank. Available selections include all Job Roles at your facility. If a job role is selected here, only scheduled events with responsible staff in the selected group will be displayed.
Type
This field is used to filter out events and only display the scheduled events of a particular Event Type. By default this field will display 'All' and this screen will display all events. Available selections include all event types in Scheduler Preferences at your facility.
Start Date/Time
The field displays the Start Date and Time of the selected scheduled event.
End Date/Time
This field displays the End Date and Time of the selected scheduled event.
Assigned By
This field displays the user who entered the selected event in the system.
Resp. Staff
This field displays the staff member who was selected as the Responsible Staff for the event.
Event Scope
This field displays whether or not the scope of the event was set to Private or Public. Only the user who is selected as the event's Responsible Staff member can modify or view the details of Private events.
Event Status
This field displays the current status of the event. Statuses include 'Cancel', 'Complete', 'No Show', 'Pending', 'Refused', and 'Rescheduled'.
Event Type
This field displays the type of event that has been scheduled.
Patient Flag
This field displays whether or not the scheduled event has been set to display a flag message or not. 'Yes' indicates that a Flag Message has been set for the event.
Recurrence
This field displays whether or not the scheduled event has been set to recur or not. 'Yes' indicates that the event is a recurring event, which means that multiple event instances have been scheduled according to the recurrence settings.
Attendee List
This field displays the names and ID numbers of the patient or patients selected as attendees for the event.
Previous/Next
![]()
Pressing these buttons can be used to navigate back and forth among calendar dates, work-weeks, 7-day weeks, and months, depending on which calendar view is currently being used.
Delete
![]()
Pressing this button while an event is selected will bring up a message, confirming the user wants to delete the event. Pressing Yes on this message will delete the selected event.
Refresh
![]()
Pressing this button refreshes this screen to display the latest data.
(1) Day
![]()
Pressing this button will return users to the (1) Day calendar view, displayed in the screen shot above.
(5) M-F
![]()
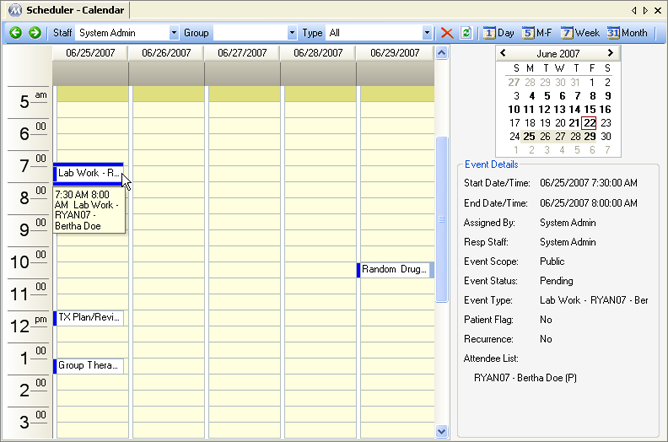
Pressing this button will open the (5) M-F calendar view, displayed in the screen shot below.
Week
![]()
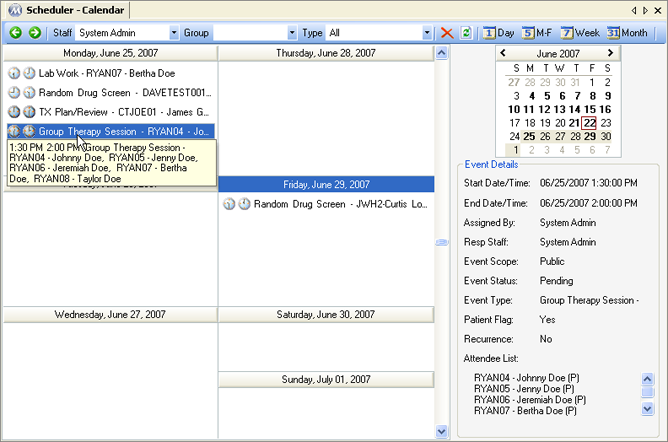
Pressing this button will open the (7) Week calendar view, displayed in the screen shot below.
Month
![]()
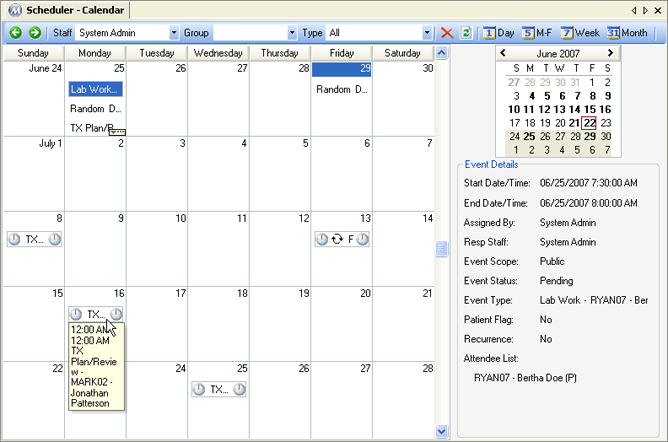
Pressing this button will open the (31) Month calendar view, displayed in the screen shot below.
Calendar Control
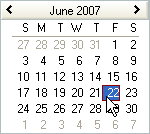
The calendar control is displayed in the screen shot below and appears in the upper-right hand corner of this screen. Clicking on a date will display the events for that date, and the arrows at the top can be used to access events in different months. Events can be rescheduled for a different date by selecting an event on the screen and holding down the mouse button while dragging it to this control, then dropping it onto a different date by releasing the mouse button over the desired date.
Use Caution When Scheduling Events for Multiple Attendees
Most facilities schedule events for one attendee (patient) at a time, to avoid common headaches associated with scheduling multiple attendees for the same event. Common problems associated with scheduling events for multiple attendees include the event being inadvertently completed before all attendees actually complete the task, selected attendees being discharged prior to completion of the event, and attendance schedule changes affecting one attendee but not the others. An additional complication arises if the scheduled event is charging patients based on its association with a Billable Service, in which case no patient is charged until the event is marked as Complete (pressing the Notify button on the Flag Messages window for scheduled events with multiple attendees does not charge attendees). For facilities submitting claims for billable scheduled events, it is recommended to not schedule a billable event for multiple attendees, not only for the initial reasons listed above, but also because rarely will each claim be accepted with the same Date of Service for each Attendee, which is either the 'Start Due Date' or 'Completed Date', depending on the associated Billable Service's 'More...' property ('Set Charge Date for Scheduled Event Service based on') setting for the associated billable service.
Scheduler Preferences
The Scheduler - Preferences window provides many configuration options for each scheduled event, and also allows users to create and configure new scheduled events. It is highly recommended that each facility scrutinize these preference settings for each scheduled event being used, making changes as needed so that events are scheduled more efficiently on a day-to-day basis. In order to set up a Billable Service for a Scheduled Event, the 'Third Party Billable?' checkbox must be checked for the event on the Scheduler - Preferences for the event being entered or edited.
Billable Scheduled Events
Scheduled events can be associated with Billable Services on the Billable Services screen, so that Attendee Patient and/or Third Party balances can be charged a set amount when the event is marked as 'Complete'. Scheduled Event Billable Services can be configured to charge Attendees on the date an event is Completed, or on the 'Start Due Date' of an event via the Additional Billable Service Information window. Refer to the Billable Services screen topic for more details on setting up Scheduled Event Billable Services.
Cancelling a Completed Scheduled Event Associated with a Billable Service Does Not Undo Any Associated Charges
When a Billable Service is configured to charge Attendees for an event marked as 'Completed', such charges will remain in place if a user later cancels the Completed event. This is by design, because some facilities require that these charges remain valid in unusual scenarios. If a Completed event is cancelled, the Charge Manager and/or Undo Accounting Transactions screen(s) must be used to remove associated charges as needed.
Overriding Event Details
Related to the above consideration, the Override Settings tab allows facilities to restrict which data can be overridden by users for each event. This ensures facility-wide consistency for how each event will behave in the system.
Substitution Variables
Substitution variables are turned on by default on the Preferences screen, General Preferences - General Setup, '4. Use Substituation Variables in the Scheduler Comments' setting. If this preference is turned off (unchecked), then the 'Comment' field for Flag Messages and Email Reminders will be blank, unless otherwise edited to include text in Scheduler - Preferences. Some facilities prefer to use substitution variables for some events but not others, needing specific text to appear for certain events. In this case the preference setting should be left on, and 'Comments' should be modified for each event as needed on the Scheduler - Preferences screen.
Scheduler - Review Events Screen
All actions related to scheduled events performed on this screen can also be performed on the Scheduler - Review Events screen. The Scheduler - Review Events screen is Methasoft's original scheduler interface, which provides unique event filtering options not available on this screen. It is up to each user to decide which screen provides the most efficient means of scheduling and managing events.
Scheduled Events by Responsible Staff
Automatically schedule review for Goals
Display attendee list on scheduler calendar
Default User responsible for Random Drug Screens
Use Substitution variables in the Scheduler Comments
Display Popup reminder when scheduling for multiple attendees